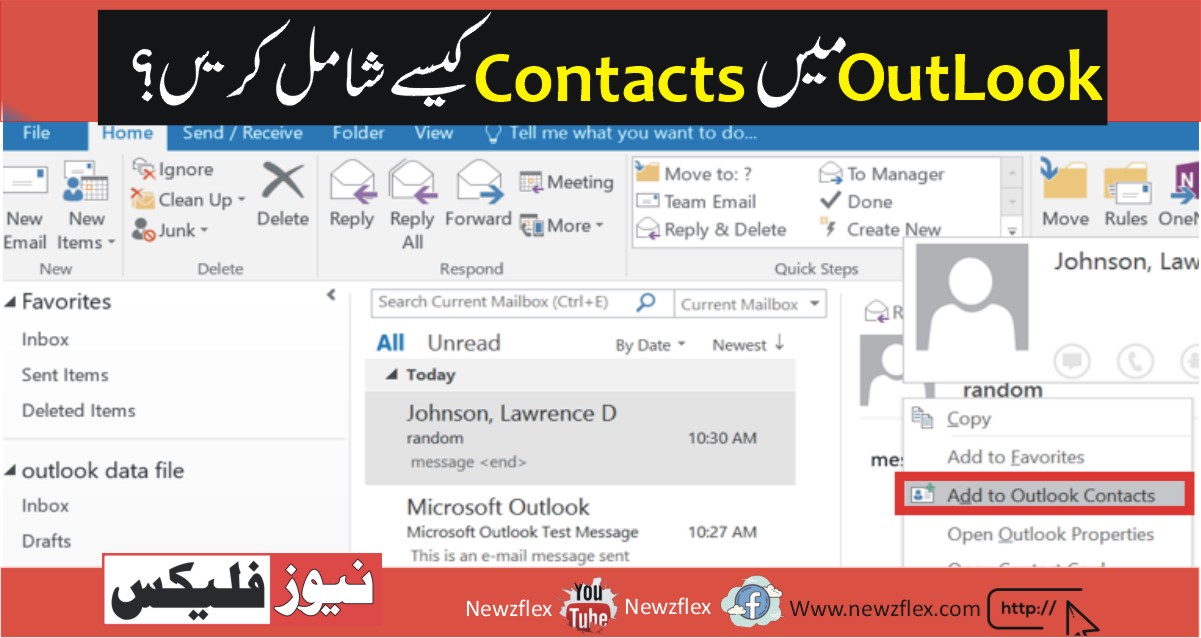
How to send a custom Auto-Reply from Outlook
Outlook can find an Out of Office reply that’s sent to everyone within the date and time range. The Out of Office reply is that the same for everybody. You’ll find some rules for it but at the top of the day, the identical reply is distributed to everyone.
If you’d wish to send an auto-reply to someone or a gaggle of individuals, you’ll be able to create a custom auto-reply rather than tweaking the Out of Office feature. Check out how you’ll be able to set an Out of Office message in Microsoft Teams.
Custom Auto-Reply in Outlook
Before you begin, you ought to know that this solution comes with subsequent conditions/limitations.
- This can only be founded from the Outlook desktop app.
- You must be using an @outlook or @microsoft account to use the feature.
- The auto-reply is often sent to one person, multiple people, or a whole group.
- Outlook must be running on your desktop to send the reply.
Create Reply Template
The first step to making a custom auto-reply is to form a template message. This template is going to be the reply which will be sent.
- Open Outlook.
- Compose a New Message.
- Enter a subject and a body. Skip adding a recipient.
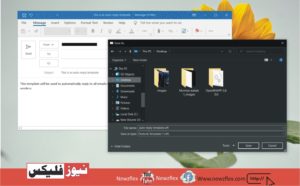
- Go to File>Save as.
- Open the Save as type dropdown and choose the Outlook Template .oft format.
- Enter a reputation for the template and save it.
Set up Auto-Reply
Now that the template is prepared, we are able to create the foundations that may send it.
- Open Outlook.
- Go to File.
- Click Manage Rules & Alerts.
- In the new window that opens, click New Rule.
- In the Rules Wizard window, click the Apply rule on the message/ Recieve option at the underside.
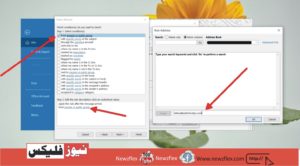
- Under Step 1: Select Condition, select From people or public group.
- In the section at the underside, click the linked people or public group.
- Enter the e-mail or emails you would like to line up an auto-reply to.
- Click OK, then click Next.
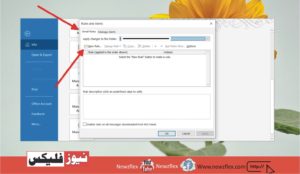
- On the What does one want to try and do with the message screen, select Reply employing a specific template.
- In the panel at the underside, click a particular template.
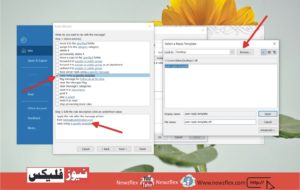
- On the new window, click Browse and choose the folder you saved the template to.
- Select the template from the panel at the bottom.
- Click OK, so click Finish.
- You will see a prompt telling you to stay Outlook open for the auto-reply to be sent. Click OK and you’re done.
The Bottom Line
Outlook supports plenty of different rules for automation. You’ll value more highly to mark a message as read, archive it, etc., all from the foundations. re-evaluate them and customize your auto-reply further.
آؤٹ لک سے حسب ضرورت خودکار جواب کیسے بھیجیں۔
آؤٹ لک ایک آؤٹ آف آفس جواب ترتیب دے سکتا ہے جو تاریخ اور وقت کی حد کے اندر ہر کسی کو بھیجا جاتا ہے۔ آفس سے باہر جواب سب کے لیے یکساں ہے۔ آپ اس کے لیے کچھ اصول مرتب کر سکتے ہیں لیکن دن کے اختتام پر سب کو ایک ہی جواب بھیجا جاتا ہے۔اگر آپ لوگوں کے ایک گروپ کو خودکار جواب بھیجنا چاہتے ہیں، تو آپ آؤٹ آف آفس فیچر کو ٹوئیک کرنے کے بجائے اپنی مرضی کے مطابق آٹو جواب بنا سکتے ہیں۔ چیک کریں کہ آپ مائیکروسافٹ ٹیموں میں آفس سے باہر پیغام کیسے ترتیب دے سکتے ہیں۔
آؤٹ لک میں حسب ضرورت خودکار جواب
شروع کرنے سے پہلے، آپ کو معلوم ہونا چاہیے کہ یہ حل درج ذیل شرائط/حدود کے ساتھ آتا ہے۔
نمبر 1: یہ صرف آؤٹ لک ڈیسک ٹاپ ایپ سے ترتیب دیا جا سکتا ہے۔
نمبر 2: فیچر استعمال کرنے کے لیے آپ کو @آوٹ لک یا @مائیکروسوفٹ اکاؤنٹ استعمال کرنا چاہیے۔
نمبر 3: خودکار جواب ایک فرد، متعدد افراد، یا پورے گروپ کو بھیجا جا سکتا ہے۔
نمبر 4:جواب بھیجنے کے لیے آؤٹ لک آپ کے ڈیسک ٹاپ پر چل رہا ہونا چاہیے۔
جوابی ٹیمپلیٹ بنائیں
حسب ضرورت خودکار جواب بنانے کا پہلا قدم ٹیمپلیٹ پیغام بنانا ہے۔ یہ ٹیمپلیٹ وہ جواب ہوگا جو بھیجا جائے گا۔
نمبر 1: آؤٹ لک کھولیں۔
نمبر 2: ایک نیا پیغام تحریر کریں۔
نمبر 3: ایک مضمون اور ایک جسم درج کریں۔ وصول کنندہ کو شامل کرنا چھوڑ دیں۔
نمبر 4: فائل سیو ایز پر جائیں۔
نمبر 5: سیو ایز ٹائپ ڈراپ ڈاؤن کھولیں اور آوٹ لک ٹیمپلیٹ .او ایف ٹی فارمیٹ کو منتخب کریں۔
نمبر 6: ٹیمپلیٹ کے لیے ایک نام درج کریں اور اسے محفوظ کریں۔
How to send a custom auto-reply from Outlook
خودکار جواب ترتیب دیں۔
اب جب کہ ٹیمپلیٹ تیار ہے، ہم وہ قواعد بنا سکتے ہیں جو اسے بھیجیں گے۔
نمبر 1: آؤٹ لک کھولیں۔
نمبر 2: فائل پر جائیں۔
نمبر 3: قواعد اور انتباہات کا نظم کریں پر کلک کریں۔
نمبر 4: کھلنے والی نئی ونڈو میں، نئے اصول پر کلک کریں۔
How to send a custom auto-reply from Outlook
نمبر 5: رولز وزرڈ ونڈو میں، پیغام پر اصول لاگو کریں پر کلک کریں۔ نچلے حصے میں آپشن وصول کریں۔
نمبر 6: مرحلہ 1 کے تحت: حالت کو منتخب کریں، لوگوں یا عوامی گروپ سے منتخب کریں۔
نمبر 7: نیچے والے حصے میں، لنک کردہ لوگوں یا عوامی گروپ پر کلک کریں۔
نمبر 8: وہ ای میل یا ای میل درج کریں جن پر آپ خودکار جواب سیٹ اپ کرنا چاہتے ہیں۔
How to send a custom auto-reply from Outlook
نمبر 9: ٹھیک ہے پر کلک کریں، اور پھر اگلا پر کلک کریں۔
نمبر 10: پیغام کی اسکرین کے ساتھ آپ کیا کرنا چاہتے ہیں پر، مخصوص ٹیمپلیٹ کا استعمال کرتے ہوئے جواب دیں کو منتخب کریں۔
نمبر 11: نیچے پینل میں، ایک مخصوص ٹیمپلیٹ پر کلک کریں۔
نمبر 12: نئی ونڈو پر، براؤز پر کلک کریں اور وہ فولڈر منتخب کریں جس میں آپ نے ٹیمپلیٹ کو محفوظ کیا ہے۔
نمبر 13: نیچے والے پینل سے ٹیمپلیٹ کو منتخب کریں۔
نمبر 14:ٹھیک ہے پر کلک کریں، اور پھر ختم پر کلک کریں۔
How to send a custom auto-reply from Outlook
نمبر 15: آپ کو ایک پرامپٹ نظر آئے گا جس میں آپ کو آؤٹ لک کو خودکار جواب بھیجے جانے کے لیے کھلا رکھنے کے لیے کہا جائے گا۔ ٹھیک ہے پر کلک کریں اور آپ کا کام ہو گیا۔
نتیجہ
آؤٹ لک آٹومیشن کے لیے بہت سے مختلف اصولوں کی حمایت کرتا ہے۔ آپ کسی پیغام کو پڑھے ہوئے کے بطور نشان زد کرنے کا انتخاب کرسکتے ہیں، اسے آرکائیو کریں، وغیرہ، سبھی کچھ اصولوں سے۔ ان پر جائیں اور اپنے خودکار جواب کو مزید حسب ضرورت بنائیں۔